Saving a Crawl Space from Total Failure in Monroe, OH
Challenge
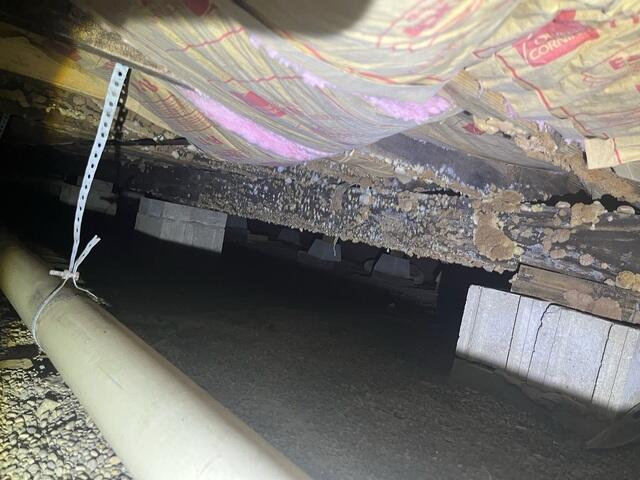
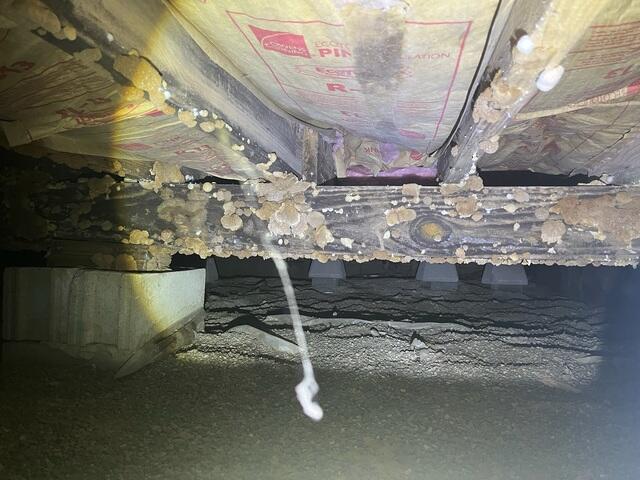
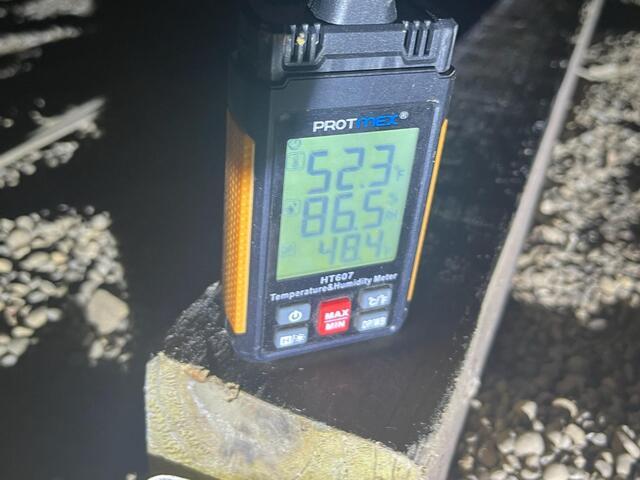
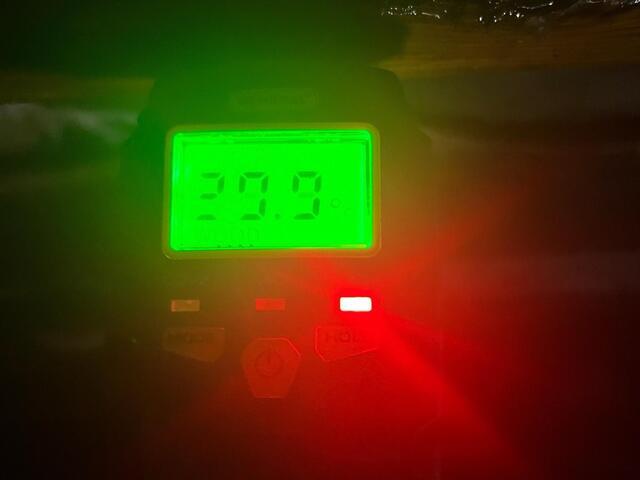
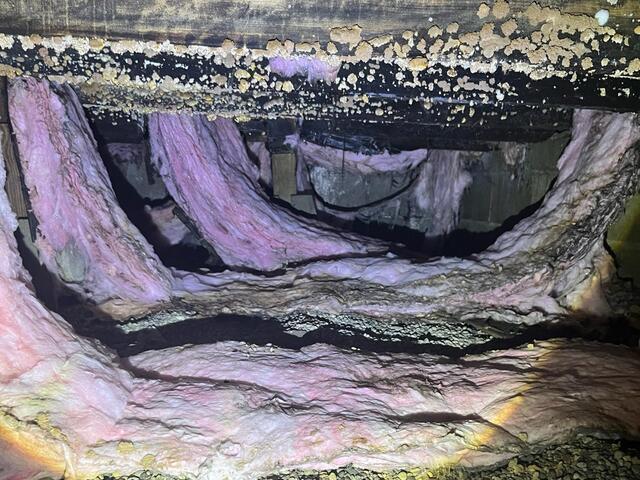
This crawl space in Monroe, OH, was in pretty gruesome shape when we first inspected it. The wooden framing was crumbling at the touch, fist-sized mushrooms grew from the boards, and mold spores had soaked the air. This home was at serious risk of collapsing above the crawl space in certain spots, and the moldy air was certainly a health concern for anyone living there. For most properties, over 50% of the air on the first level of the home entered from the crawl space. This statistic is attributed to a process called the stack effect, where air travels upwards through a home due to pressure differences. However, in this case, (and most other cases) the homeowner didn't pay mind to the condition of their crawl space until they recognized new cracks that appeared on the first level of the home. After witnessing the cracks, the homeowner gave a call to their handyman who recognized that this crawl space situation was above their capabilities. The homeowner then gave The Basement Doctor of Cincinnati a call to educate them on their crawl space problem(s).
Solution
When breaking the unfortunate news to the homeowner—who hadn't seen their crawl space in years, our Inspector made sure to be gentle, honest, and transparent; this project was going to take a lot to stop the house from falling apart. Our Inspector showed them pictures of the mold growth, the humidity levels, and the condition of the wooden framing to visually display the issue at hand. We also made sure to let them know that we have seen this level of rot before in many other homes, and that we have repaired many other crawl spaces that were roughly in the same condition. The homeowner trusted our Inspector in their assessment, and the two worked together to come up with a solution that would stop moisture and mold, and would restrengthen the structural integrity of the home.
For the solution, we decided to break the project up in parts to best coordinate the efforts of our crews:
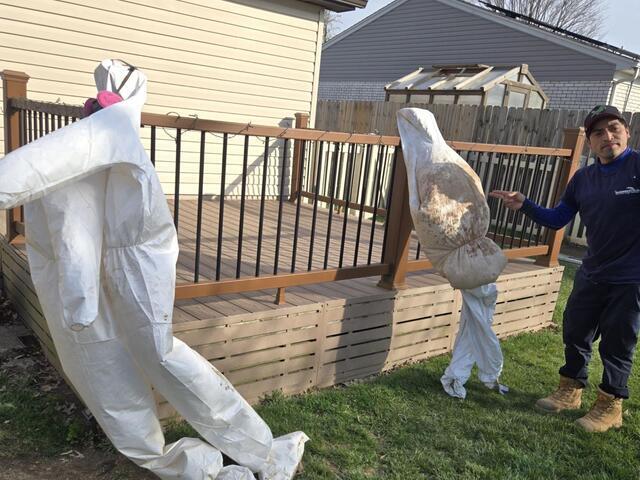
1. For the first step, we sprayed our Mold-X2 treatment throughout the space to treat active mold growth, clean affected surfaces, and apply an antimicrobial solution that helps inhibit future growth. By doing this on the first day, we ensured that our crew could safely spend hours completing the rest of the project without breathing in moldy air. This step also helped our crew gain a clearer picture on exactly which parts of the wooden framing needed replacing. Although we had a pretty good idea of which parts would need replacing beforehand, we made sure to communicate with the homeowner that we wouldn't know for sure until the area was free from surface mold. For this step, we recommended the homeowner spend a couple nights away from the home for safety purposes.
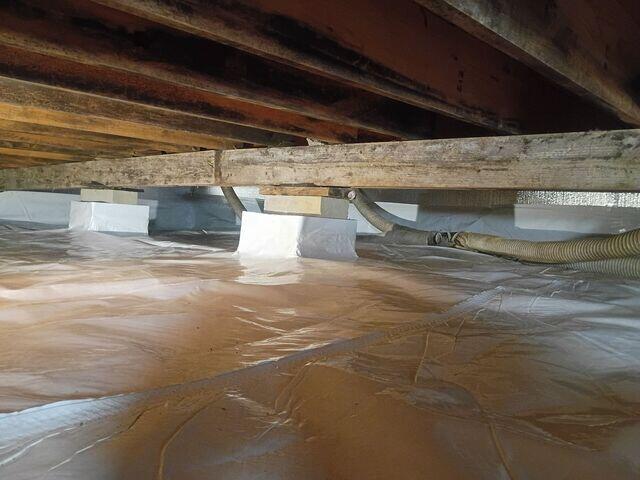
2. A few days after chemical treatment, we then installed our encapsulation system by:
- Removing the fiberglass insulation.
- Installing perforated pipe around the perimeter in the floor for water drainage.
- Installing a SmartSump sump pump system.
- Installing an UltraSump battery back-up pumping system to the SmartSump.
- Installing a discharge line for the sump pump.
- Installing dimpled drainage matting across the floor, (before our CleanSpace vapor barrier so the matting lies underneath the vapor barrier).
- Installing a SaniDry Sedona dehumidifier to keep the humidity low.
- Installing SilverGlo insulation panels across the walls.
- Installing vent covers over the vents.
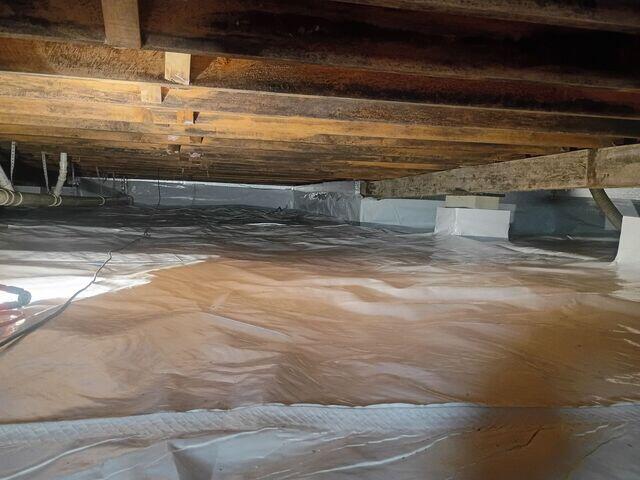
3. For the last step, when the space was dry and clean, we then repaired/replaced all the parts of the wooden framing that weren't up to code. This included:
- 543 linear feet of untreated wood for sistering parts of the floor joists.
- 54 linear feet of untreated wood for replacing parts of the main beam.
- 122 linear feet of treated wood for replacing parts of the band board.
- 115 linear feet of treated wood for replacing parts of the sill plate.
- 156 linear feet of foam rim joist insulation, (after we replaced the band board/rim joists).